Access Control
AppLife Server provides access control to applications and updates based on string token identification. The client is identified through either the auto-generated Client ID or the integrator designated Client Access Key. Access Control Lists can be created that include a list of values that identify clients by either Client ID or Client Access Key. These lists can then be assigned to individual applications and update versions.
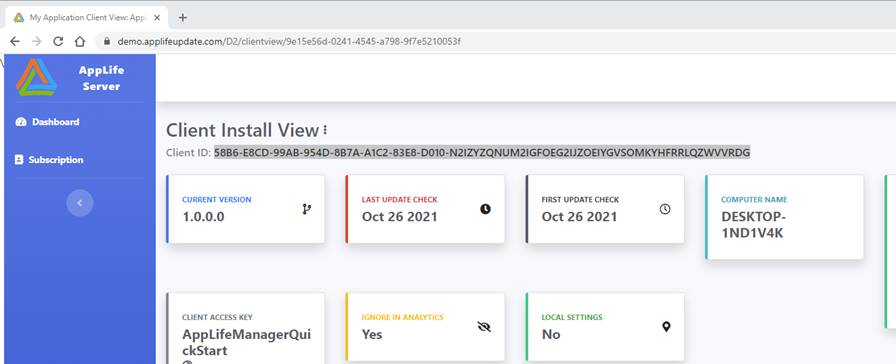
The Client ID value is auto-generated by the Update Controller, based on the PC hardware and the complete path location of the hosting executable. The Client ID value can be viewed by:
•Inspecting the ClientID property of the AppLife Update Controller embedded in the host application
•Viewing the Client Details page of the AppLife Server Dashboard
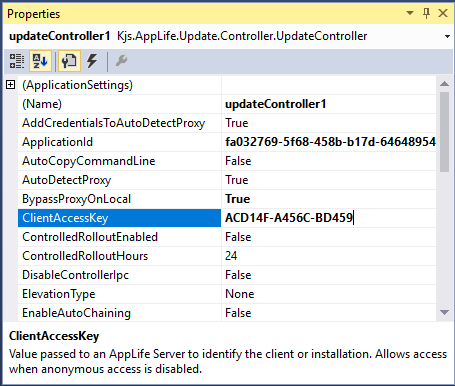
The Client Access Key is defined by setting the ClientAccessKey property of the AppLife Update Controller within your application source code. The value is often set based on a client license key value or another organizational value of significance.
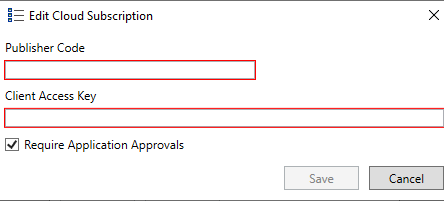
When using the AppLife Manager, the Client Access Key is set when registering a new subscription.
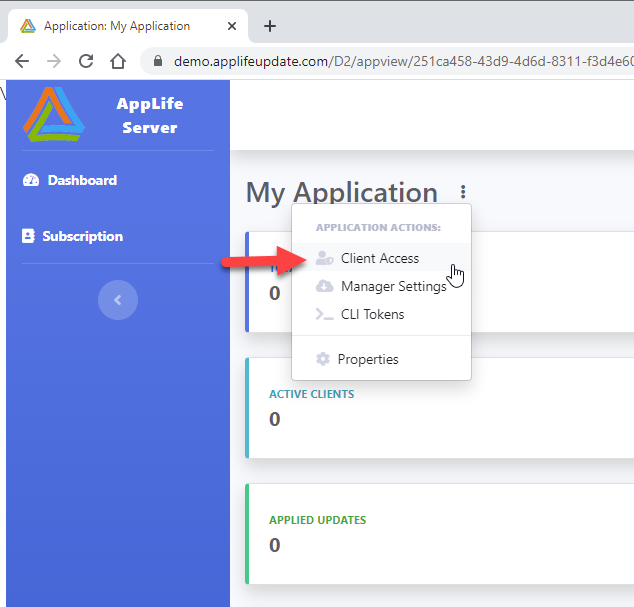
The Access Control List editor can be accessed the Application Access Control Action menu.
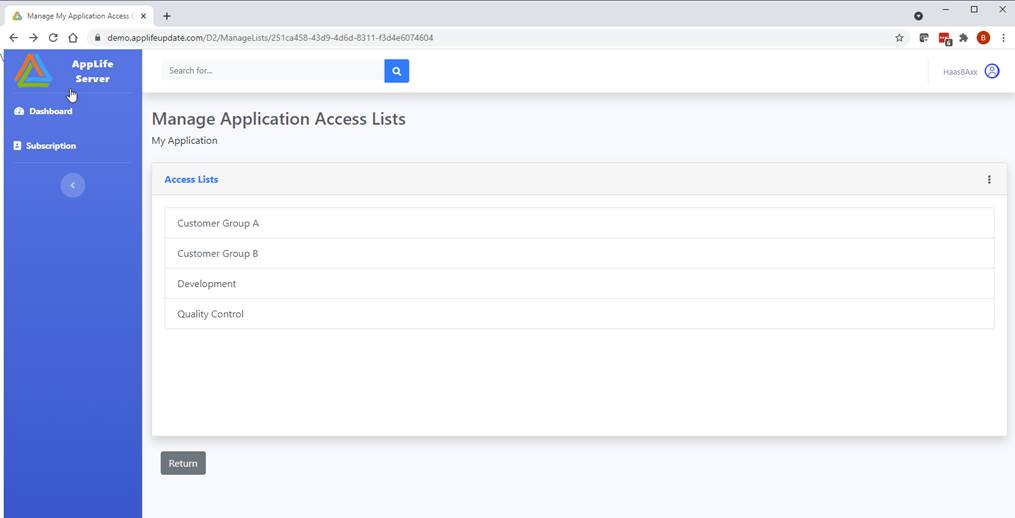
Access Lists are scoped to individual applications, however access lists can be configured to be Shared between applications.
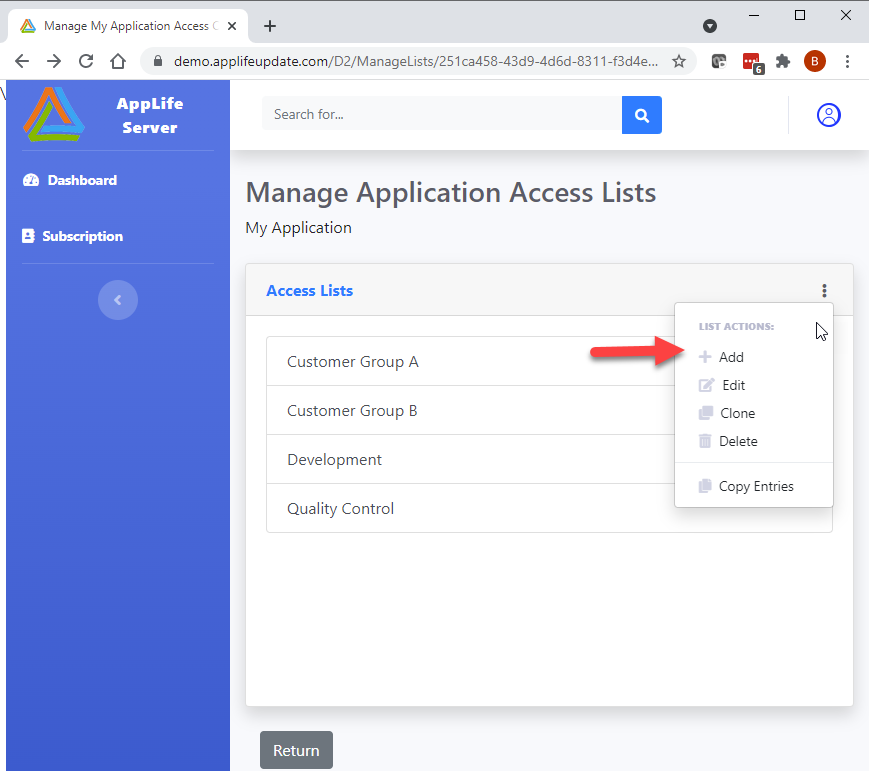
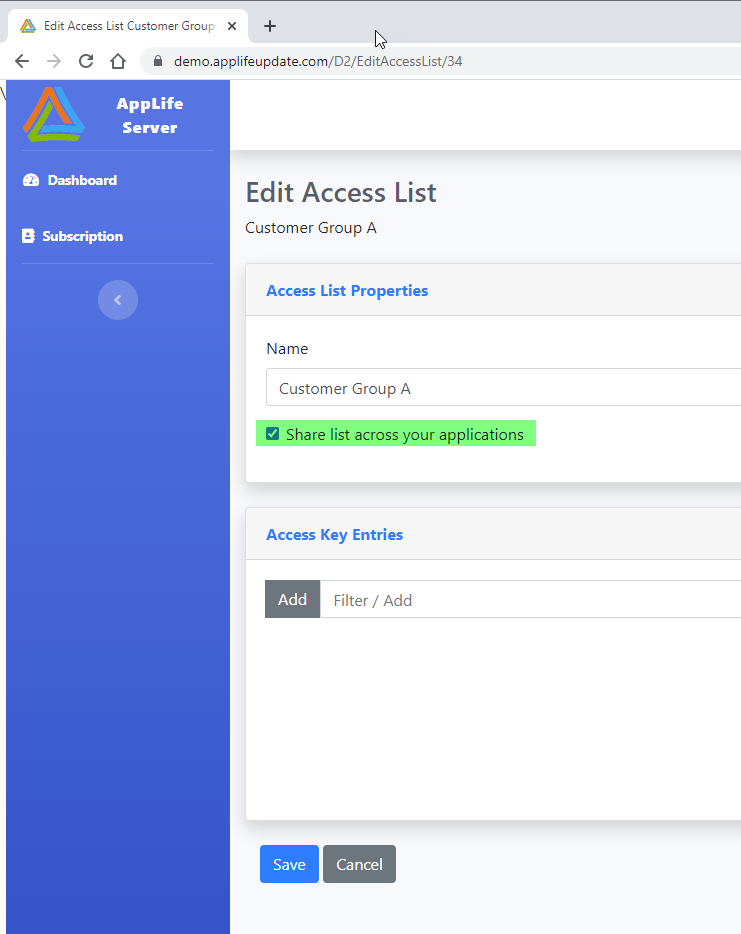
To create a new Access List, click the Add button on the Access List Editor Action Menu. Provide a name for the list. List names must be unique.
Once created, the list can be selected in the editor, where List Entries will be displayed.
List Entries
A list entry matches a Client ID or Client Access Key value. The list entries are case insensitive.
To add an entry to an Access List, select the Access List and then enter a value to add and click the Add button. The Add/Filter textbox will filter the existing access keys to help prevent entering duplicates.

Access Lists can be added, edited and deleted from the editor view.
List Entries can be added and removed.
Once Access Lists have been created, they can then be assigned to an Application or a Version to control visibility of the applications and updates.
From the Application Edit view, ensure that Anonymous access is disabled. Disabling anonymous access will allow individual Access Control Lists to be checked and unchecked.
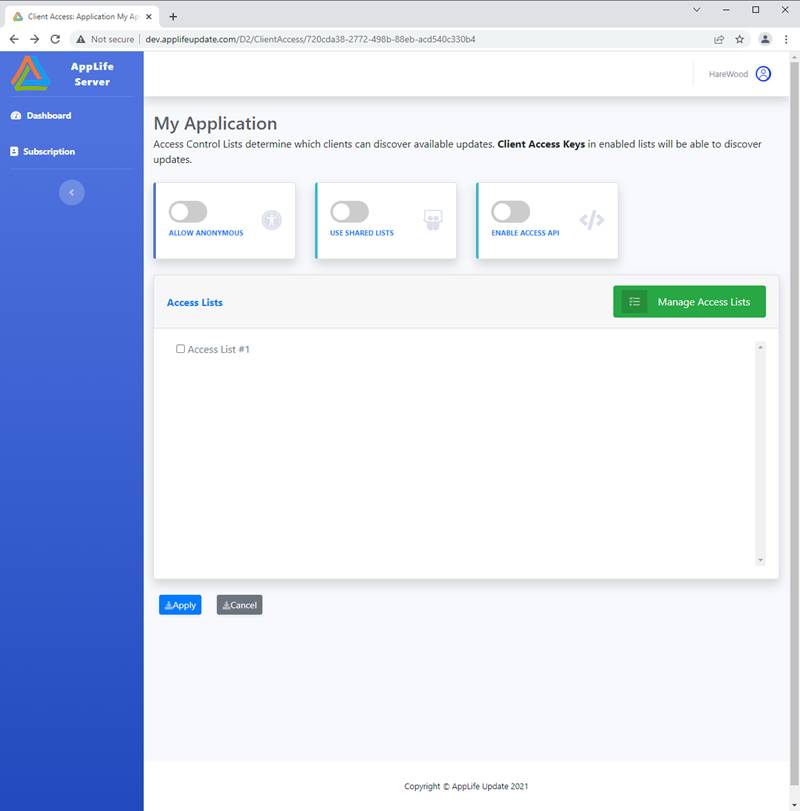
Individual Updates can be set to:
•Application Level Access Control – Access to the update is based on the Application Level settings
•Version Level Access Control – Access is based only on the Access Lists specifically checked for the Version.
•None – No access to the specific version is allowed.
Update access control can be set through the AppLife Server dashboard and can be set during an update publish process.
Access Control Lists are scoped to individual applications, but can be shared between applications within a subscription.
To share Access Control lists between applications, two actions must be taken.
1. The Access List must be designated as Shared.
2. The application that will consume a shared access list must be configured to use shared lists.
Sharing an Access List
To share an Access List, navigate to the Access List Editor and edit the chosen access list, then check the Share this list option. The user performing this action must be an administrator or a publisher for the designated application.
Consuming a Shared Access List
To consume an Access List shared by another application, edit the properties of application and select the Show Shared Lists option.
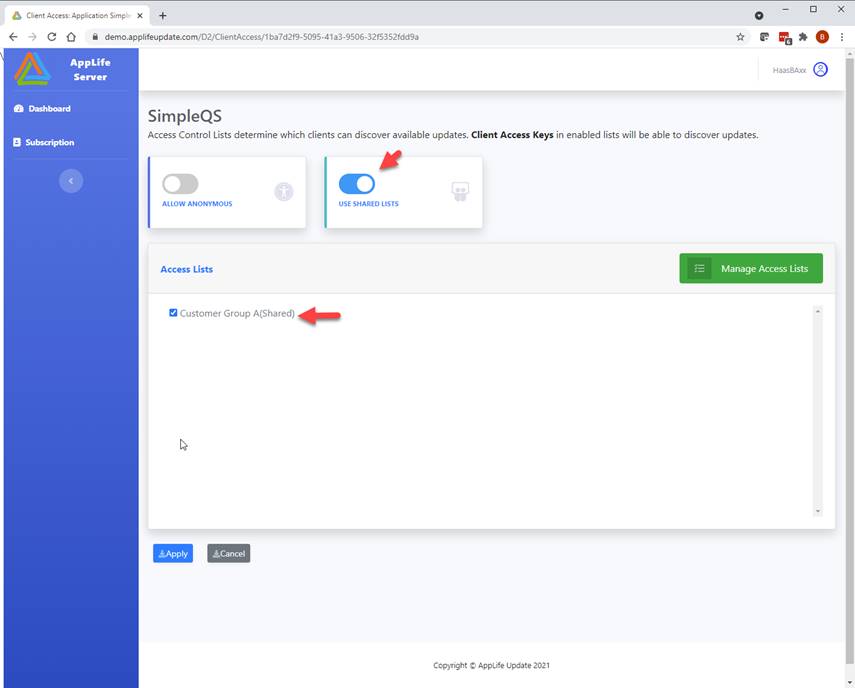
Once selected, any lists shared by other applications on the server will be displayed and annotated as Shared. Shared lists can then be selected to be included for access control to the application or version.
Note: When Shared Lists are used, they will be also be displayed in the Access List editor IF the currently logged in user has publisher rights for the application that owns the list. If the current user is not a publisher for the application that owns the shared lists they can select the list but cannot edit the list contents.
The Access List API enables programmatic integration into AppLife access list management, allowing for a secondary system to Add lists, Remove lists, Add list entries and Remove list entries. By utilizing the Access List API, a supervisory system can add and remove Client Access Keys from configured lists, thereby controlling the availability of applications and update packages through AppLife Cloud.
Note: Access List assignments to applications and packages cannot be manipulated through the Access List API. Only list contents are available to be modified.
Enabling the API
The Access List API must be enabled per application. Once enabled, an API token must be generated. A valid token is required to be submitted with each API method call. Tokens are user specific and can be revoked.
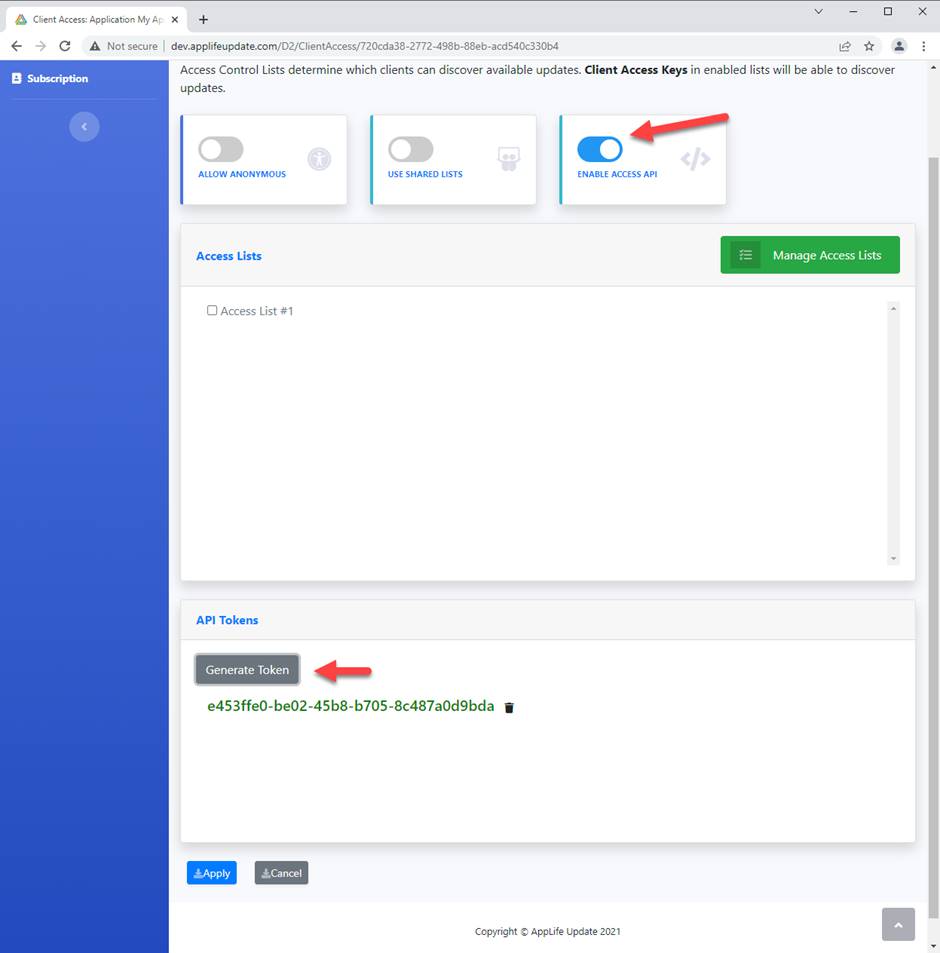
Once the API has been enabled for an application and a token generated, it can be called from an external system.
IP Address Filtering
If Publishing IP Address Filtering is enabled for the application subscription, external systems accessing the Access List API must also be included in filter list.
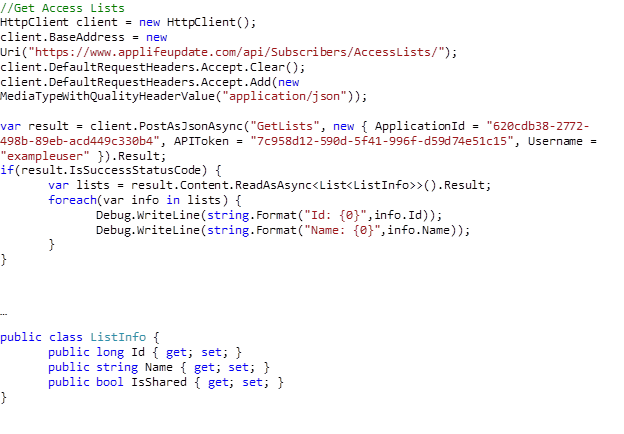
API Base URL:
https://www.applifeupdate.com/api/subscribers/AccessLists
Security
Each available method requires a POST action with a JSON payload that will include a username and a user-dependent access token. Https is required.
POST Action
Content Payload:
JSON object:
ApplicationID: string
APIToken: string
Username: string

Returns:
Json object array. Objects contain an integer Id, string Name, and bool IsShared property.

Errors:
400 – Bad Request. When any of the payload parameters are invalid
415 – Unsupported Media Type. When payload not Json formatted.
Example:
C#
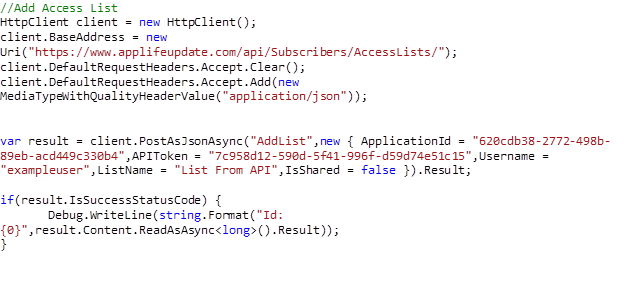
POST Action
Content Payload:
JSON object:
ApplicationID: string
APIToken: string
Username: string
ListName: string
IsShared: bool

Returns:
Integer that is the new list id.

Errors:
400 – Bad Request. When any of the payload parameters are invalid
415 – Unsupported Media Type. When payload not Json formatted.
Example:
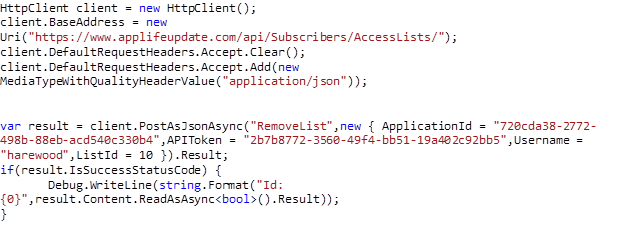
POST Action
Content Payload:
JSON object:
ApplicationID: string
APIToken: string
Username: string
ListId: int

Returns:
bool indicating success or failure

Errors:
400 – Bad Request. When any of the payload parameters are invalid
415 – Unsupported Media Type. When payload not Json formatted.
Example:
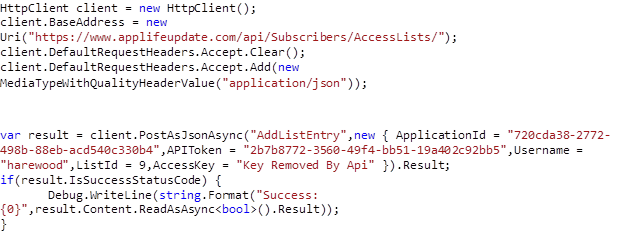
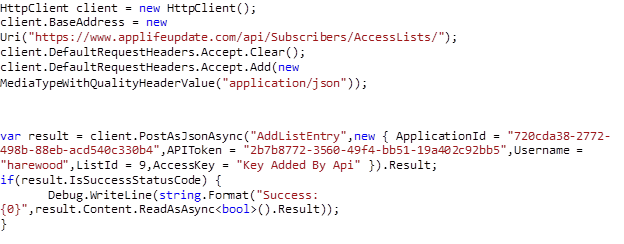
POST Action
Content Payload:
JSON object:
ApplicationID: string
APIToken: string
Username: string
ListId: int
AccessKey: string

Returns:
bool indicating success or failure

Errors:
400 – Bad Request. When any of the payload parameters are invalid
415 – Unsupported Media Type. When payload not Json formatted.
Example:
POST Action
Content Payload:
JSON object:
ApplicationID: string
APIToken: string
Username: string
ListId: int
AccessKey: string

Returns:
bool indicating success or failure
Errors:
400 – Bad Request. When any of the payload parameters are invalid
415 – Unsupported Media Type. When payload not Json formatted.
Example: