
Command Line Build Utility
AppLife Update includes a console application that allows you to automate performing build and publish operations on AppLife Update projects. You can use this console application to integrate AppLife Update build operations into your automated build process. You can also add script to a post-build action in Visual Studio to automate publishing an update for a given build configuration.
To use the Command Line Utility, a Publish Token must be generated for the application by the user intending to use the utility.
The AppLife Update console application is located in the installation directory.
[InstallDir]\ AppLifeUpdateCmd.exe
AppLife Builder is installed per user, into %LocalAppData%\Kinetic Jump Software\AppLife Builder. The contents of this folder can be copied to a location that better fits automated build processes.
Usage:
AppLifeUpdateCmd <ApplicationID> <Username> <PublishToken> [<update version>] [options]
<ApplicationID> The AppLife Cloud Application ID.
<Username> The user name of a valid AppLife Cloud account.
<PublishToken> A valid Publish Token. Publish tokens are created in the AppLife Cloud dashboard. They are user and application specific and can be revoked.
<update version> The version of the update to be built from the project.
Options:
/actionbase:<directory> Sets the base directory used by update actions that support relative file paths.
/accesslist:<list names> Sets the availability of the published update. One or more Access Lists can be included, delimited by , or ;.
/keypairpassword:<password> The application key pair password. A password can be optionally configured for an application that locally encrypts the application security key-pair. When configured, this password must be passed by parameter to the command line builder.
/summary:<file> Replaces the summary text in the project with the contents of the specified file.
/targets:<target list> Replaces the target versions in the project with the specified list of target versions. Versions can be prefixed with ‘>’ (e.g. “>5.0.0.0) to indicate that any higher versions are also valid. Instead of a target list, “All” or “last” can also be specified. “All” replaces the project’s target list with the “(all)” target, allowing any previous version to be updated. “Last” replaces the project’s target list with the last saved update version.
/forceelevation:<elevation> Sets the update to override the elevation setting specified on the update controller when it is applied. The following values can be specified:
None Forces the update to be applied without elevation.
UAC Forces the update to be applied with UAC elevation.
Service Forces the update to be applied with service elevation. Note that the AppLife Update Service must already be installed, and your application registered, in order to use service elevation.
/customdata:<file> Replaces the custom data in the project with the contents of the specified file.
/availability:[normal|test] Sets the availability of the current update in the project to normal or test.
NOTE: The Test flag has been DEPRECIATED. It is recommended to use Access Lists to control test availability.
/silent Suppresses all output.
/? Displays help information
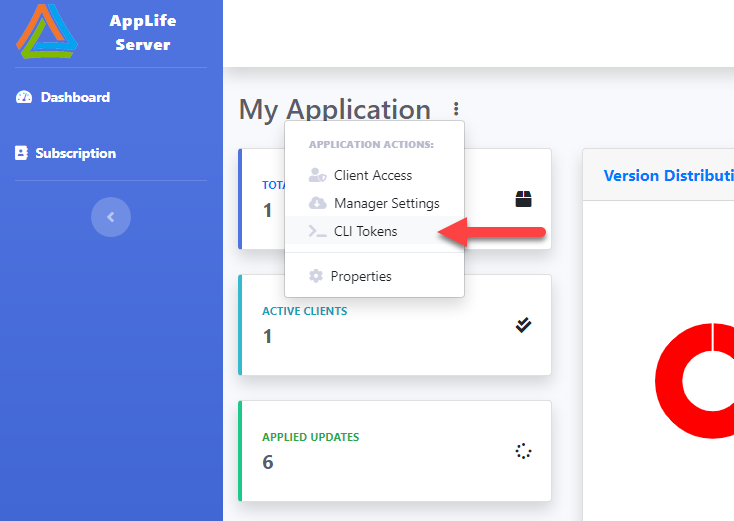
To enable using the AppLife Command Line Interface for a cloud application, the publisher must generate a token. Tokens don’t expire, but can be revoked.
To create a CLI Publisher Token:
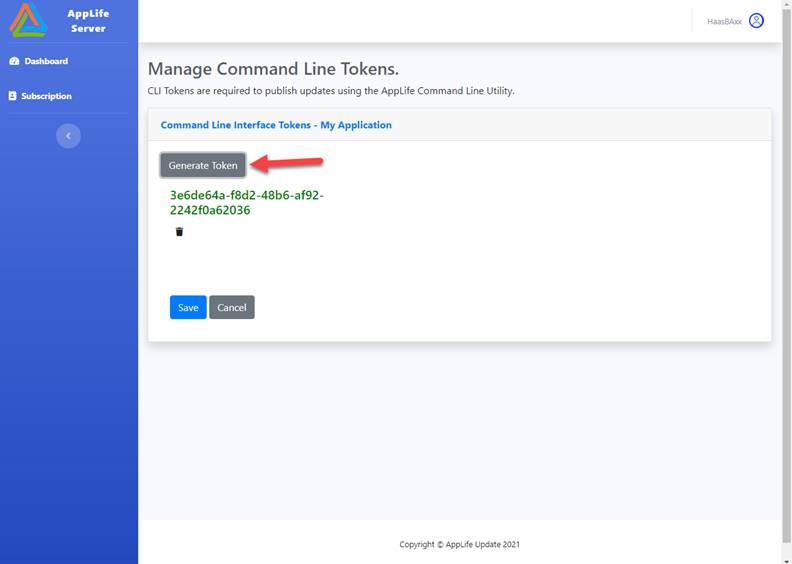
A valid CLI Token must be passed into the Command Line utility when publishing an update.