
The AppLife Manager UI
The AppLife Manager UI lets you interact with the AppLife Manager Windows Service.
Use this command to add a new Cloud Subscription to AppLife Manager. Adding a new subscription only needs to be performed once and requires administrative privileges.
1. Click on the Register button.
2. Acknowledge the UAC prompt to elevate permissions.
3. On the Register New AppLife Server window, click the Add button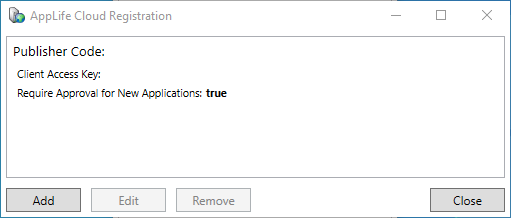
4. Provide the Client Access Key that this client will be identified by. This is usually a license key or some other type of individual identifier. If you are going to allow anonymous access to your application(s), this value can be left blank. The Client Access Key can be used to identify the installation within the AppLife Server dashboard. It is recommended that a Client Access Key always be assigned.
5. Provide your Publisher Code. Your publisher code can be found on the Subscription page of the AppLife Cloud dashboard.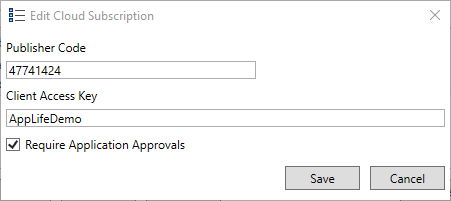
6. Click the Save button
Once configured for a subscription, the AppLife Manager will initiate an inquiry and begin to manage subscription applications for which the provided Client Access Key has permissions to manage.
NOTE: The Require Application Approvals setting requires that any subscription applications added in the future and discovered automatically by AppLife Manager require an elevated administrative approval prior applying any discovered updates.
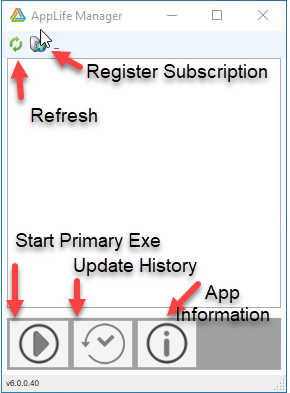
AppLife Manager will check for updates for managed applications periodically as configured for each individual application, and check the cloud for changes to managed application configurations every 4 hours. To manually initiate an update check on-demand, use the Check for Updates button.
This command will initiate an application list refresh and then check all configured applications for updates.
To view the AppLife Manager UI output window, use the context menu depress the O button while simultaneously depressing the Control button (Ctl – O).
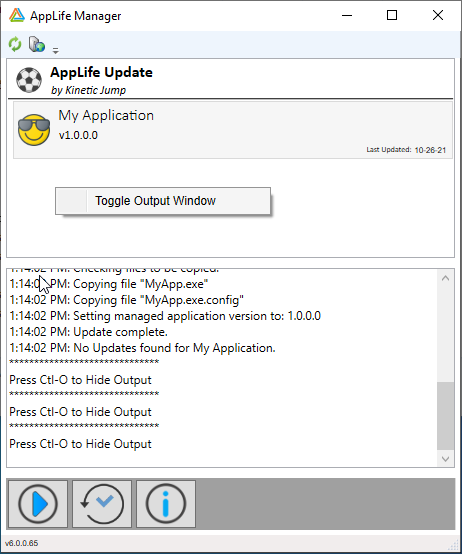
Information and commands processed by the AppLife Manager can be viewed in the output window.
The Start Application Button will launch the configured primary executable for the application.
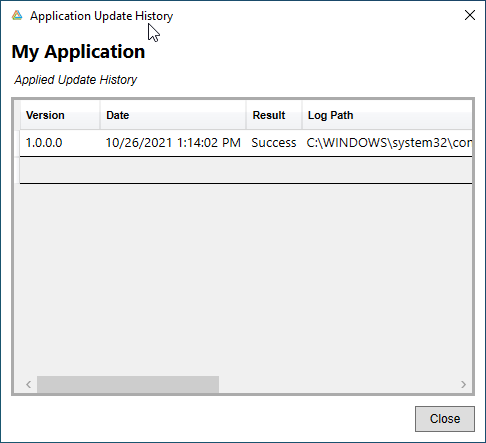
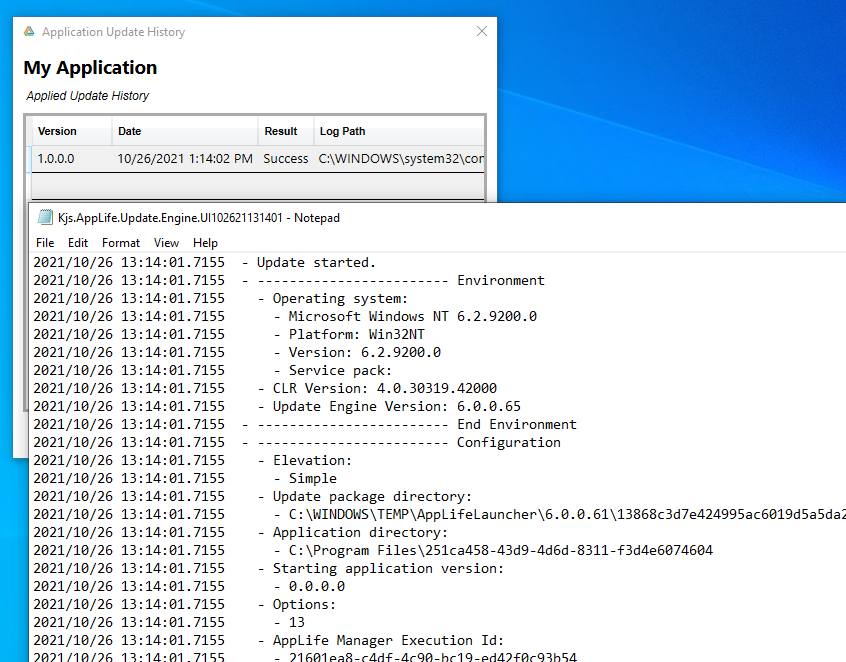
The Update History Button displays a list of all executed updates for the application. Double clicking an entry will open the update execution log associated with the update. Note: Administrative privileges are required to open the log.
The Application Information Button displays information about the application and publisher of the application.
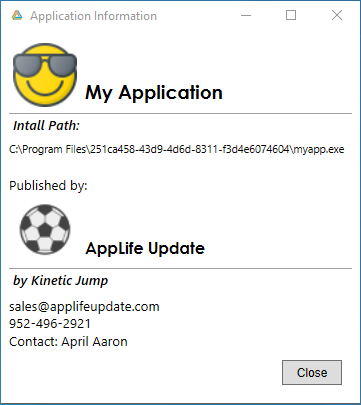
The information displayed in the dialog is configured through the AppLife Dashboard. The Subscription Properties page includes the Organization, by-line and image properties of the publisher. The Application properties page includes the Application name.
Your Publisher Code can be located in your original subscription email and through the AppLife Cloud dashboard.
Log into the AppLife Cloud. Navigate to the Subscription page.
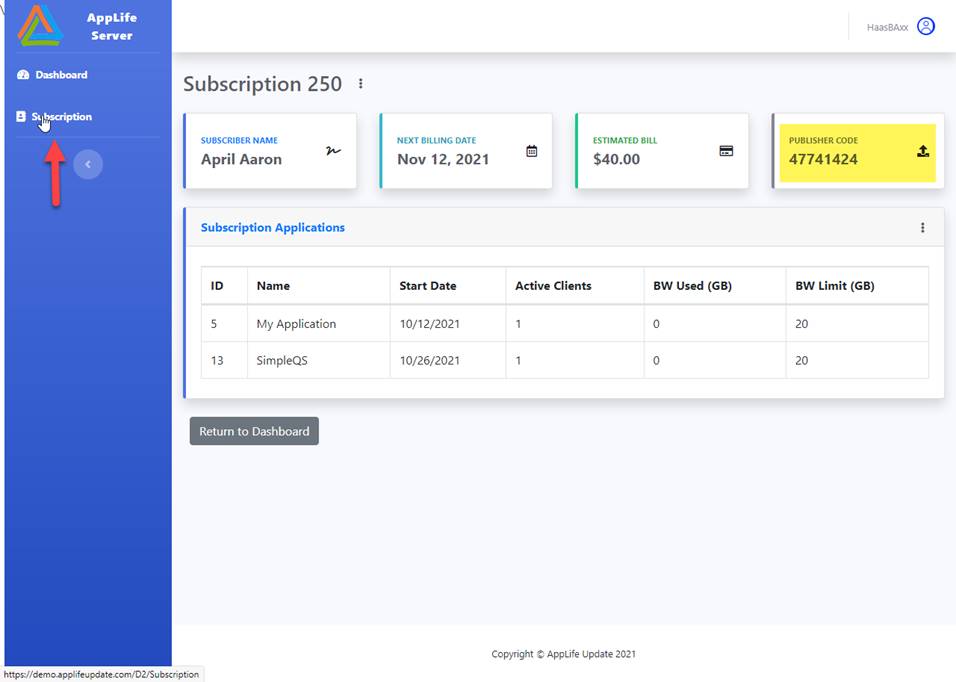
The Publisher Code can be located on the right of the page.
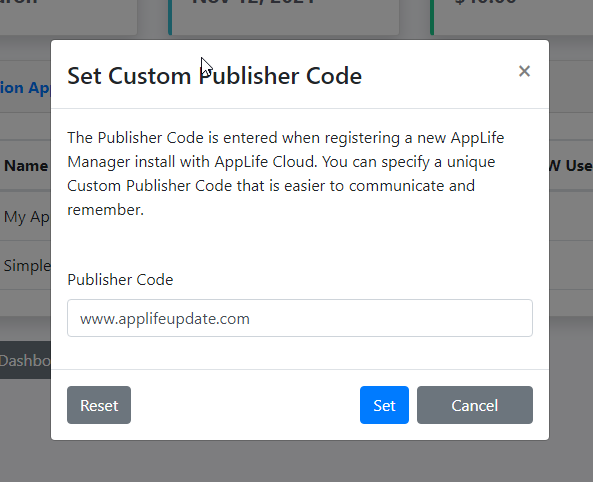
A custom publisher code can be set provide a more relevant and rememberable value. From the Subscription page, select the Set Custom Publisher Code option from the action menu.
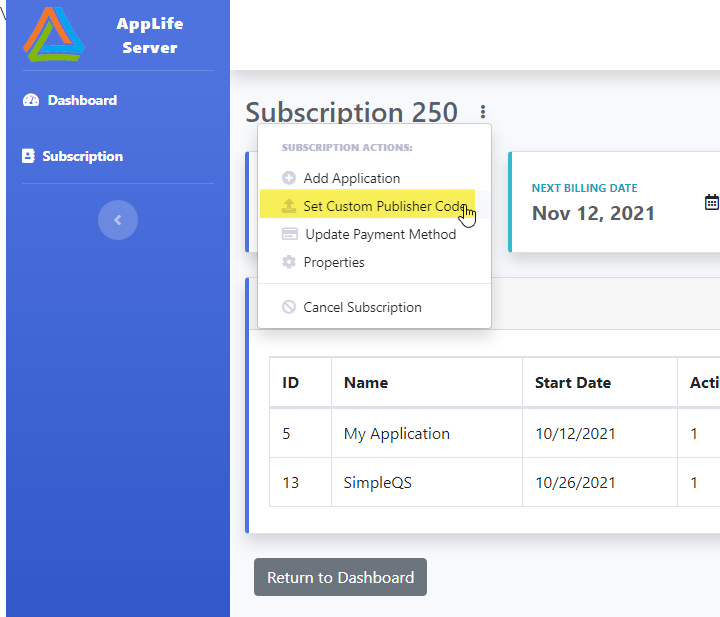
A Custom Publisher code must be unique. A common technique is to use your organization url.
AppLife Manger can be configured with your original publisher code or a configured custom Publisher Code.